WSO2 API Manager 4.0 | User Registration Multi-Step Approval Workflow
In this posts we are trying to implement a use case where an API Consumer user tries to register/sign up to the developer console and the user registration requests needs to be approved from two administrative persons before user can login to the developer console.
Here, we are going to use latest WSO2 API Manager 4.0 and WSO2 Business Process 6.5 servers.
First let’s look at the demo flow of the events after configuration so that you will first get an idea regarding the flow which we are going to achieve. We will come to the configurations at a latter part of the post.
- API Consumer user first go to the developer console.

2. API Consumer click Sign In button and redirected to the login page. Then click the Create Account button and Provide a proper username and Click Proceed to Self Register.

3. User is now redirected to Sign Up Form, where user needs to fill the relevant necessary user information.

4. User check the Privacy Policy and click Register button afterwards.

5. Popup message will be displayed with the message saying account awating administrative approval.

6. Now if the user tries to login he will get Forbidden Error since his account is still pending approval.


Now, the administrators needs to approve the user registration request in order for this user to successfully login to the developer console.
SubManager and Manager are two administrative users who are created to perform approval. First, the approval request is assigned to SubManager and once SubManager has approved the Intermediate Request, it will get assigned to Manager for Final Approval. Once Manager also has approved only then user can successfully login.
7. Now, the SubManager user is login in to the Business Process server to approve the intermediate request.

8. SubManager needs to select the task.

9. SubManager approves the intermediate request.

10. Although the initial approval completed if the user tries to login still user won’t be able to login to developer console.
11. Now, Manager logs into the BPMN Explorer to give Final Approval.


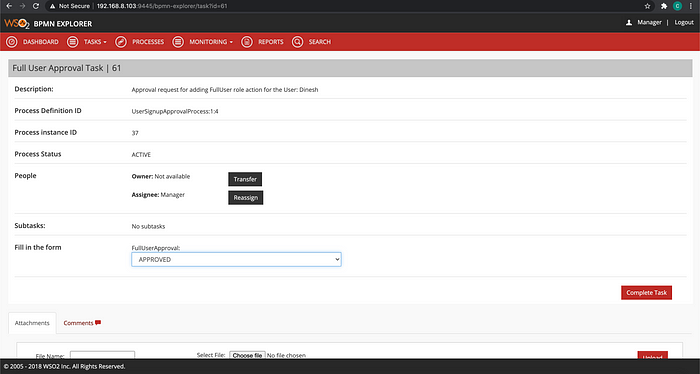
12. Now, the registered user can successfully login to the developer console.

Now let’s see what needs to be done to configure above flow.
First we will configure Business Process Server.
- First you need to create a BPMN activity process using WSO2 Integration Studio. Here i have used Integration Studio 7.2 and you can open the sample project provided here[1].

2. Go to the Package Explorer View and right click on the project and click create deployment artifacts.

3. This will generate the bar file required for the BPMN Server. Therefore, if you need to re-configure anything in the flow, you can edit the flow and then re generate the deployment artifact.

4. Start the Business Process Server and login to the carbon console.

5. Deploy the BPMN process(.bar) file previously generated.


6. (Optional) View the deployed process diagram.


7. Create Role: ManagerRole

8. Create Users: SubManager and Manager

This finishes the configurations done at BPS side. So next let’s look at the configurations done at API Manager side.
- Add the signup-workflow-executor-1.0-SNAPSHOT.jar[1] to the <APIM_HOME>/repository/components/lib directory.
2. Uncomment and update the workflow configurations in the <APIM_HOME>/repository/conf/deployment.toml as follows.

3. Need to add BPS server public certificate to client-trustore.jks.
4. Start the API Manager 4.0
5. Login to the carbon console and edit workflow-extensions.xml as follows.


Note: make sure to comment out default(simple) UserSignUp Workflow.
This concludes configuration process. So afterwards you should be able to test out the above demo flow.
All the artifacts needed for the above scenario are provided in the below link.
[1] https://drive.google.com/drive/folders/1SmZOcXG5bntBv3nShRHQgs3B_BXWqvnn?usp=sharing